5 Manfaat Madu Untuk Bibir - KlinikKecantikan.co.id
https://klinikkecantikan.co.id › ...
https://klinikkecantikan.co.id/vitamin-dan-nutrisi/herbal-sehat/manfaat-madu-untuk-bibir
5 Manfaat Madu Untuk Bibir - KlinikKecantikan.co.id
https://klinikkecantikan.co.id › ...
https://klinikkecantikan.co.id/vitamin-dan-nutrisi/herbal-sehat/manfaat-madu-untuk-bibir


Abd Bakar Abdullah:
*Diarrhoea*
*Diarrhoea is caused by the sickness in stomach, intestines, liver, spleen, brain, overeating and stale/spoiled food. It is a natural way of detoxification.* Hence, it is not wise to stop diarrhoea immediately.
*Hot shower, sleep, and water fasting are the best medicine for diarrhoea.*
Whenever it starts, make intention to fast three days and massage the entire body with olive oil (thyme oil can be added) after taking a hot shower
*During the three days fasting, do not consume any food. If one feels thirsty, sip slowly cold rain water/Zam Zam water/melted ice water with naturally fermented vinegar or lemon/lime juice. It must be cold.* Otherwise, *lukewarm or hot water may accelerate the diarrhoea.*
For simple diarrhoea, 2-3 days of fasting and getting the right diet would be sufficient. However, these prescriptions may not effectively stop the diarrhoea if the cause is related to chronic diseases or acute infections.
After 3 days fasting, one may drink one of the following juices sip by sip:
▪ Green apple juice/ lemon juice/ pomegranate juice + water
▪ Carrot +green apple+ water
▪ Carrot + ginger juice + water
▪ Celery + spinach + water
▪ Yogurt water which is boiled with cumin seeds and drink it after it is cooled down.
These juices clear the toxin in the stomach and intestines, increase the beneficial enzymes and heal the wounds in these organs. Drink one lemon juice mix with garlic infused extra virgin olive oil every evening.
Hope its beneficial.
SMOOTH FINISH DIY ORGANIC FOUNDATION WITH SUNSCREEN (5OZ)
SUPPLIES/INGREDIENTS
Double-boiler (I just make my own with a glass bowl over a pot of shallow simmering water)Kitchen scale (this is my favorite kitchen scale)WhiskContainer for finished product(see more below re: container choices)1.5oz Almond Oil (or unrefined, raw, organic carrier oil of your choice; learn more about carrier oils here; purchase Pronounce Skincare Herbal Boutique Almond Oil)1oz Shea Butter (organic, raw, unrefined shea butter like this).5oz Cocoa Butter (organic, raw, unrefined cocoa butter like this).5oz Beeswax (this is by far my favorite beeswax)1/8t Vitamin E (make sure it’s not from GMO sources; this is my favorite Vitamin E).5oz Zinc Oxide (make sure it is uncoated, non-nano, and not micronized)Cocao Powder (organic cocao (or cocoa) powder like this)Cinnamon (organic cinnamon like this)
MAKE IT
Using your scale and the tare function, measure and combine the first five ingredients into the glass bowl into your double-boiler.DO NOT add the zinc oxide, cocoa powder, or cinnamon!Completely melt the first five ingredients, stirring occasionally with your whisk.Remove from heat and allow time to cool a bit (a few minutes …and wipe excess moisture off the outside of your bowl, too).Place your bowl back on the scale, hit tare, and add in spoonfuls of zinc oxide until you get to .5oz. This gives you approximately a 10 SPF coverage (as it’s approximately 10% of the total weight… read more about sunscreen here). Whisk to completely combine.Add 1/8t cinnamon; whisk to combine.Add cocoa powder a little at a time and whisk to get to the color you need…1/2T cocoa powder is a light foundation1/2T plus 1t is a medium foundation1/2T plus 2t is a medium-dark foundationSimply start with 1/2T of cocoa powder, whisk to combine, check on your wrist for a color match, and add more cocoa powder (1/2t at a time) until you reach your perfect colorPour into your selected container and allow to cool.
*T=tablespoon and t=teaspoon
LOTION CLEANSER RECIPE
Hi everyone!
This evening I have the pleasure of presenting to you, Julie from Juvascents, LLC who is sharing with us a very popular requested recipe for a lotion cleanser. Please take the time to head on over to her facebook page and show her some love! Thank you, Julie for sharing your amazing recipe with all of us here.
Much Love,
Nadia xoxo
_______________________________________________________________
My name is Julie McGee, owner of Juvascents, LLC and I produce all-natural skincare products. All of my ingredients are sustainably and ethically sourced and all of my products are tested before I release to market. Currently I’m working one-on-one with my clients and formulating to their needs. My main focus is the face, but I also like to make body products for fun.
I’ve spent the last 3 years studying and last year I became a certified Boutique Skincare Designer. I am always continuing to learn and have taken Mark Webb’s CO2 Extracts class in both Boulder, CO, and Dallas, TX and Susan Parker’s Lipids Decoded - Mastering Fixed Oils.
You can follow me on Facebook or Instagram at JuVaScents
RECIPE
Oil Phase (11%)
4% Mango butter
4% Phytomulse Chlorella or emulsifying wax NF
2% Argan oil
1% lecithin
Water phase (82%)
28% vegetable glycerine
48% distilled water, aloe gel, herbal tea or hydrosols (or any mixture of)
5% witch hazel
1% arrowroot powder, cornstarch or other thickener
Cooling phase (7%)
5% FSS Bio-Water Bamboo
1% FSS Fruit Enzyme Complex
1% Geogard ECT (all-natural preservative). If using another brand, use at manufacturers usage rate
If your preservative requires <5% or you are using <2% essential oil blend, make up the difference in the water phase.
DIRECTIONS
• Set up both double boilers side by side and begin heating
• Add oil phase ingredients to the double boiler and whisk well
• Add water phase ingredients to the other double boiler and whisk well (use separate whisk)
• When both temperatures reach 150 degrees F (66 C) slowly pour the water phase ingredients into the oil phase ingredients, whisking continuously. Product will become opaque.
• Remove from heat and add your Bio-Water Bamboo
• Please your double boiler insert into ice bath to quickly cool to room temperature
• Check pH and make adjustments as necessary. Should be between 4.5-5.5.
• Add performance ingredients and whisk gently
• Check pH again and make adjustments if necessary.
• Add preservative and check pH again.
• Pour into your glass or airless pump bottles.
Notes
• Since this is a wash off, choose lower cost ingredients for your skin type
• Herbal tea is a great ingredient to add to your water phase. Make sure to thoroughly strain before adding.
• The Phytomulse, Bio-Water Bamboo and Fruit Enzyme Complex can be found at Formulator Sample Shop.
_______________________________________________________________
Will you be trying out this recipe? If you do, do not forget to share your photos and experiences in the comments below and Julie will do her best to answer any questions in the comments below regarding her recipe!
get to control what goes into it and the quality of the ingredients! Here is the perfect recipe for honey lip balm that will nourish your lips and have some of the benefits of pure local honey!
Honey Lip Balm
approx 15 lip balm tubes
1 oz bees wax (about 2 tbsp)
1 oz shea butter ( about 2 tbsp)
1/2 oz coconut oil (about 1 tbsp)
1/2 oz almond oil (about 1 tbsp)
1/4 oz local honey (about 1/2 tbsp)
few drops of vitamin e (optional)
essential oils (optional) I used sweet orange
Directions: In a double boiler or very small sauce crockpot melt bees wax slowly. Add shea butter and wait a few minutes until it melts. Add coconut oil and almond oil, stir until melted and combined. Add honey and whisk well (it can be difficult to mix the honey throughout the oil wax mixture.) I actually stirred it between eat pour too. Add essential oil if preferred. Place in tins or empty lip balm tubes and let cool on the counter. I know it might be hard but wait until completely cooled! Enjoy!
GREEN TEA HONEY FACE WASH
(makes about 2 oz)

INGREDIENTS:
3 tablespoons honey3 tablespoons avocado oil2 tablespoons soapwort extract1/2 tsp matcha green tea powder5-10 drops essential oils
INSTRUCTIONS:
Mix all ingredients together until thoroughly combined (I mixed with a fork for about 2 minutes)Transfer to an air tight bottleTo use, wet your skin, apply face wash with clean hands by rubbing in small circles, and wash off with warm water. It won’t foam a lot but should make a small amount of tiny suds.
DIY Manuka Honey Lotion Recipe

What you need
¼ cup coconut oil (where to get it)½ cup shea butter (where to get it)2 tsp manuka honey (where to get it)10 drops lavender essential oil (where to get it)1 vitamin E capsule (where to get it)Double boiler (where to get it)Hand mixer (where to get it)Storage jar (where to get it)
Directions
Firs things first, gently melt down your coconut oil and shea butter in a double boiler. This will make both ingredients easy to work with as they are solid in their natural state.Once you’re done melting them, let the mixture cool down a bit then stir in your 2 tsp of manuka honey.Prick a vitamin E capsule with a safety pin carefully then squeeze out the oil into the mixture.Now place your mixture in the refrigerator for 15 minutes. This will make it partially solidify which facilitates easy whipping of the mixture into a lotion.Once then time is up, get it out and start whipping with a hand mixer until it turns white and creamy.When this happens, add your lavender essential oil and whip again until everything is well incorporated.Your DIY manuka honey lotion is ready! Scoop it up into sterilized glass jars and store in a cool dry place. It can last more than 6 months without going bad. That’s provided you don’t get any water/dirt/other contaminants into it.To use, get a suitable amount using clean fingers then rub it onto the affected area. Make sure the region you’re going to be applying the lotion is clean. You can also apply it on wet skin to seal in moisture.
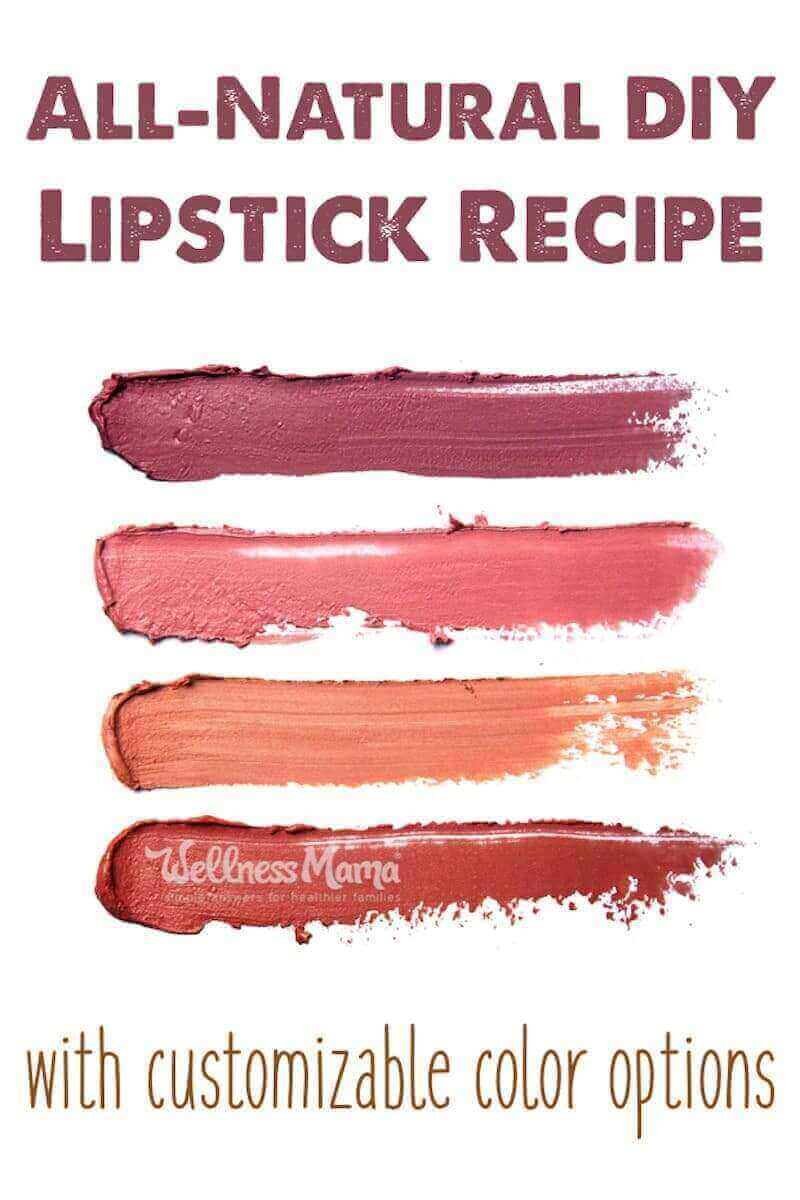
Homemade Lipstick Recipe
1 teaspoon beeswax pastilles1 teaspoon Shea butter or Cocoa Butter1 teaspoon coconut oil
This base recipe will create a smooth, clear lipstick that is very moisturizing and protective. It is made from completely natural ingredients and is safe for us on the lips or skin. If you want, you can add color with the following add-ins to create a color of your choice.
Optional Color Add-Ins
For Red Hues: 1/8 teaspoon of beet root powder or 1 drop of natural red food coloring with no chemical additives. NOTE: Add these very slowly as a little goes a long way!For Brown/Tan Hues: 1/4 teaspoon (or more for color) of organic cocoa powder, a tiny pinch of cinnamon or turmeric to get the shade you wantFor a more Matte texture: 1/4 teaspoon bentonite clay– I use this with a color so it doesn’t leave a white tint on the lips.For Scent: A drop of essential oil of choice (optional)
Homemade Lipstick Instructions
Melt the beeswax, shea butter/cocoa butter and coconut oil in a glass jar without a lid in a small pot of simmering (not boiling) water. It should melt quickly because so little of each ingredient is used.
When melted, remove from heat and add any optional ingredients like color or scent. To get the hue in the picture above, I used a tiny pinch of beet root powder (1/8 tsp or less), 1/4 tsp cocoa powder, 1/8 tsp bentonite clay, 1/8 tsp cinnamon and a drop of peppermint essential oil (just because I like the smell). I think I added slightly more cocoa powder after mixing to darken it up slightly but I didn’t measure that one.
Once all ingredients are mixed well but still liquid, use a dropper to pour into the lip chap container. I used the glass dropper from an old tincture bottle. Fill just below the top as it will expand slightly as it cools. Leave to cool for at least half an hour. Store in a cool place (under 80 degrees) or it will soften.
Enjoy!
Ever made your own cosmetics? How did it go? What hue would you make of this recipe? Share below!
For this homemade lip balm, I chose to make herb-infused olive oil for my base oil. This is simple to do, but it does add another step to the recipe. You can skip this step, but I think it’s worth doing because herb infused olive oil adds another dimension of healing to this homemade lip balm. The mint is cooling and soothing on dry lips and the lemon balm is healing and acts as an antiviral to help ward off germs and prevent cold sores (if you’re prone to them). So, although it’s an extra step, again I think it’s worth it.

How to Make Herb-Infused Olive Oil for the Lip Balm Recipe (the “quick method”):
1/2 cups olive oil1/8 cup dried peppermint1/8 cup dried lemon balm
In a double boiler add the olive oil and herbs and keep on a low heat for 4-5 hours, ensuring to keep the oil temperature under 120 deg F, this helps keep the integrity of the herbs.
Once your olive oil is lovely and fragrant, strain out the herbs and set the oils aside. The oil will soon become the base of your lip balm recipe.

Homemade Lip Balm Recipe:
Finally, it’s time to gather your ingredients and get on to the DIY lip balm recipe! Below are the supplies and ingredients that you will need:
1/2 cup olive oil (I recommend using the herb-infused olive oil from the method above)1/2 oz beeswax ( have a little extra nearby if you like a thicker lip balm.)5 tbsp beet powder (OPTIONAL: you’ll end up using 3-5 tbsp depending on the level of color you like)5 drops Carrot seed oil (this adds a bit of natural sun protection for your lips)10 drops Peppermint essential oil (classic, cooling effect and flavor)5 drops Rosemary essential oil (mimics the classic “Burt’s” flavor that everyone loves)
My Amazon Picks

NOW Solutions Carrot Seed Oil, 1-Ounce
$16.99
(889)

NOW Organic Rosemary Essential Oil, 1-Ounce
$6.72$13.99
(509)

NOW Peppermint Essential Oil, 4-Ounce
$14.90$19.99
(1309)

White Beeswax Pellets 1 lb (16 oz), Pure, Natural, Cosmetic Grade, Top Qual…
$11.95
(109)

Supplies for Homemade Lip Balm:
stovetop or burner2 small old saucepans (to create a double boiler )spoonfine sieve Pipette20-25 lip balm containers (0.15 oz size)
My Amazon Picks

Mary Tylor Naturals Lip Balm Containers Tubes 50 White, BPA Free, Made …
$12.97
(206)

Transfer Pipette, 3.0ml Graduated, 5.0ml Capacity, Large Bulb, 155mm, Ka…
$5.99
(551)

Culina 3" Conical Mesh Strainer. Stainless Steel Chinois
$6.99
(64)

Bellemain Stainless Steel Measuring Cup Set, 6 Piece
$18.95$55.95
(3153)
In your double boiler, warm the olive oil and beeswax on low until fully melted. Add essential oils and turn the heat down to as low as possible. Allow the melted lip balm mixture to stay warm on the stove for 5-10 mins while you set up your tubes.

OPTIONAL BUT FUN: How to Make Tinted Lip Balm
I decided to add a little flare by making a tinted lip balm. I used beet powder to tint the base lip balm recipe. I found that the beet powder added a sweet flavor as well as soft, natural color to the tinted lip balm recipe. I am really happy with the result.

Organic Beet Root Powder (1 lb), Raw &…
By Naturevibe Botanicals
$16.99
Rated 4 out of 5
Beetroot powder can be found at most health food shops or online. It is great for using as a natural colorant or adding to smoothies for a deep earthy and slightly sweet flavor.
To make tinted lip balm simply add 4-5 tablespoon of beet powder to your warm lip balm recipe from above, allow it to stay warm in the double boiler for 5-10 mins, then strain with your fine sieve, to filter out any large beet partials.
This tinted lip balm will have a transparent, glossy, merlot color to it. It’s defiantly more of a tinted lip gloss than a true lipstick, which is what I wanted. 🙂


How to Package Your Homemade Lip Balm
When it comes to packaging your homemade lip balm, you have a few options. I had some .5 oz tins on hand, which I considered using, but I knew that I was going to tint this homemade lip balm, so I didn’t want the hassle of dealing with getting tinted lip balm on my finger and having to find somewhere to wipe it off every time 🙁 They work great for an untinted lip balm recipe.

MagnaKoys Empty Slip Slide Round Tin…
By Magnakoys®
$7.09
Rated 4 out of 5
I had seen these gorgeous paper tube all over Instagram and I really wanted to use them. I am trying to drastically reduce my plastic consumption and I thought these would be a great alternative, but I just couldn’t find them locally or on amazon.ca🙁
*But lucky for my American friends they are available on amazon.com, you can buy them here.

1/3 OZ Kraft Paperboard Lip Balm/Salve/Cosmetic/Lotion…
By KJ's Krafts
$12.99
Rated 2.5 out of 5
I opted for clear plastic lip balm tubes, they were affordable, BPA free and easy to find on amazon.ca. They do the trick, they are easy to fill and affordable enough to give them away as gifts. But I will definitely try to source some paper tubes in the future!
Mary Tylor Naturals Lip Balm Containers…
By Mary Tylor Naturals
$12.97
Rated 4.5 out of 5

OH YEAH! How Do You Actually Fill the Lip Balm Tubes???
I used a simple plastic pipette to fill the tubes. Simply suck up some of the warm liquid lip balm into the pipette and quickly fill the lip balm tube to the top. You will need to work quickly for this process, but it is the easiest, no mess method that I have found.

Store your homemade lip balm as usual, in a cool place, out of direct sunlight. Remember, it’s really just oil and wax so it will melt in the hot car… trust me 🙁
HOW TO MAKE HERB-INFUSED BALMS
For the past few weeks I have been infusing several herbs on my windowsill using the ‘solar method’. There doesn’t seem to be any sort of precise measurement for how much oil and how many herbs are needed, but here are the rough instructions:
Place a handful or two of dried herbs in a clean, dry jar (make sure it’s completely dry – you don’t want mold to start growing) and cover the herbs with oil. I used olive oil and almond oil, but any carrier oil will work. Seal the jar and keep it in a sunny place for a couple of weeks. Give it a shake every so often. After its time in the sun, strain the oil with cheesecloth, squeezing every bit of oil out of the herbs.
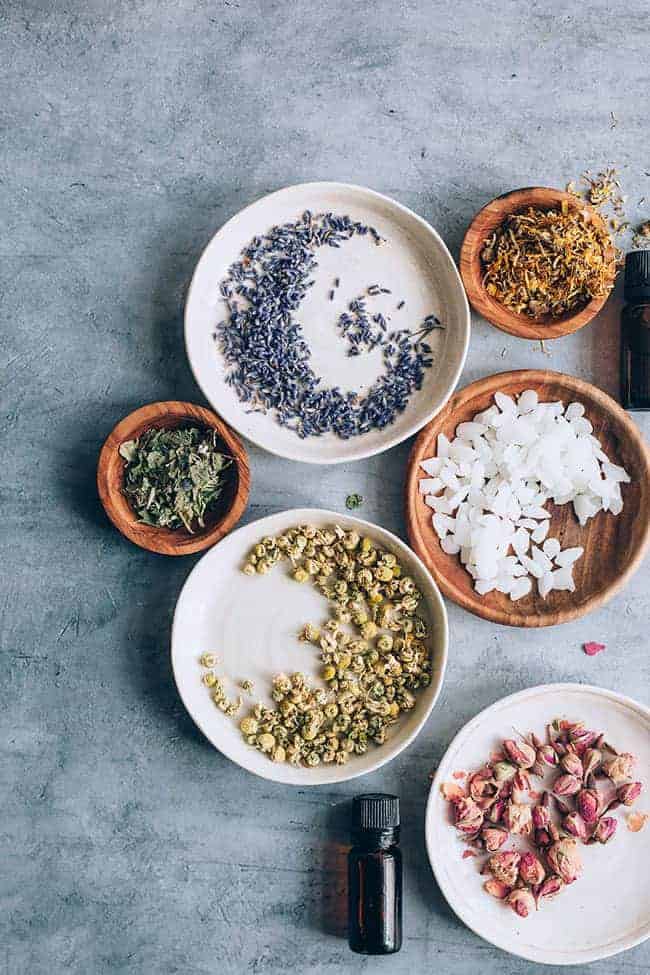
I made several infusions:
Calendula for a general healing salve (great for diaper cream too)Rose + chamomile for calming and soothing – perfect for just before bedtime.Peppermint + lavender for headaches
After the oil is ready, it’s time to turn it into a balm. Which is totally simple because you’re basically just combining the oil with beeswax.
PEPPERMINT + LAVENDER HEADACHE BALM
The basic ratio of oil to beeswax I used was 2 tablespoons of beeswax for each 1/4 cup of oil. More oil will make a creamier balm, while more beeswax will make it more solid. So if you find the consistency isn’t right for you, you can melt it down again and add more oil or beeswax.
Combine the oil and beeswax either in a saucepan or use a metal bowl as a makeshift double broiler. Either way, I would highly recommend picking one pan or bowl and designating it for this sort of purpose. You don’t want to eat beeswax remnants the next time you make soup.
Melt the oil and beeswax together over low heat. When the beeswax is melted, pour into a clean jar or container. Add a few drops of essential oil if you want a stronger scent. Let salve cool and harden.

ROSE + CHAMOMILE CALMING BALM
I’m generally too impatient to wait weeks for something to be ready, but seeing the pretty herbs on the windowsill was such a treat each day.
<3 Air Epal Turunkan Berat Badan/ Langsing Secara Selamat <3
.......
Since ramai yang pm mintak resepi air epal tu, Kat sini aisya post balik.
Aisya Mula amalkan minum air epal ni,selepas kakak aisya Suttarat Wan Hanifah hilang 10kg dalam masa lebih kurang tiga bulan..Asalnya,aisya sangat la malas nak cuba. Tapi bila terinspirasi dengan kakak sendiri dalam masa sebulan berat badan aisya hilang 3 kg.kalau dulu,selalu je sakit- sakit urat,mudah penat ,Alhamdulillah..sekarang tidak lagi.Yang menariknya, perut pun kempis.
Buat Anda diluar Sana yang mahu kekal Lansing dan sihat dengan cara traditional,boleh la amalkan air epal ni.
🌸Resipi🌸
5 batang serai dan 3biji epal HIJAU
2-3 helai daun pandan
1-1.5 liter air
Rebus sehingga epal jadi lembik
Kebaikan:
🌸keluarkan angin dalam badan
🌸kempiskan perut
🌸menurunkan berat badan
🌸Cepat kenyang
🌸awet muda
🌸kulit cerah
🌸mengurangkan kolestrol
🌸menhilangkan sakit badan/sakit urat
🌸sesuai utk orang sakit lutut(amat disyorkan)
🌸menghilangkan sakit tumit..
🌸meringankan tubuh badan
🍓Sesuai utk lelaki dan perempuan
Selamat mencuba😃😃😃
# sharejikabermanfaat
# nakcantikjanganmalas
# cantikluardalam
# jomsihatdancantik
<3 Info Tambahan <3
P/S: <3 (y) (y)
*kulit epal tak perlu kupas. Tapi kena bersihkan dgn sebaiknya.
* org pantang- Better minum lepas pantang ye
* Boleh minum sepanjang hari,setiap hari
* Ibu BF boleh minum. Penulis juga BF mum. Tapi untuk tgok kesesuaian anak. Boleh cuba dulu sikit. Bergantung pada baby juga.
....
Kredit info:Aisyah Abdullah
Like & share untuk manfaat bersama (y)
Resipi
1 cawan jus lemon
(1 Cup Fresh Lemon Juice)
1 cawan jus halia
(1 Cup Fresh Ginger Juice)
1 cawan jus bawang putih (1 Cup Fresh Garlic Juice)
1 cawan Cuka epal
(1 Cup Apple Cider Vinegar)
3 cawan madu
(3 Cups Honey)
Bancuh kesemua ramuan tadi - jus lemon + jus halia+ jus bawang putih + cuka epal (kecuali madu) dan jerang (panaskan) perlahan-lahan selama setengah jam sehingga kira-kira 1 cawan kandungan campuran tadi telah terwap keluar (evaporate) dan hanya tinggal 3 cawan sahaja. Biarkan ia sejuk kemudian masukkn 3 cawan madu.
Isikan ke dalam balang bersih dan minumlah sebanyak 3 sudu teh ketika perut kosong setiap pagi.
In sha Allah, dengan izin Allah anda akan sembuh.
Petua Turunkan Kolestrol Yang Berkesan Dengan Air Rendaman Kacang Bendi
Kacang Bendi mempunyai banyak kelebihannya. Saya selalu mengalami kebas-kebas kaki. Suami pula tinggi bacaan kolestrol. Selepas amalkan minum air rendaman kacang bendi ini saya tidak lagi alami kebas kaki, kolestrol suami juga telah turun. Berbaloi dari berhabis duit beli ubat setiap bulan.”
“Selain membantu menurunkan kadar kolestrol,Kacang Bendi juga mengandungi Asid Folik yang sangat bagus diamalkan untuk ibu mengandung mahupun ibu yang menyusukan bayi.Saya berjaya menyusukan anak sehingga dia berumur 3 tahun!”
Selain itu ia juga bagus untuk:
Mengurangkan kolesterol
Membantu dalam kes diabetes
Memperkuat sistem kekebalan tubuh
Mencegah penyakit buah pinggang
Meredakan asma
Mengurangkan jumlah glukosa yang diserap oleh makanan melalui saluran pencernaan
Petuanya:
Bahan-Bahan:
10 hingga 15 batang kacang bendi
Satu liter air
Cara membuatnya:
Bendi harus dipotong terlbih dahulu sebelum dimasukkan ke dalam bekas rendaman air.
1. Basuhkan kacang bendi terlebih dahulu sebelum dipotong menjadi bahagian kecil seperti dalam gambar.
2. Masukkan bendi yang sudah dipotong itu ke dalam air atau bekas yang anda suka.
3. Simpankan air rendaman kacang bendi di dalam peti sejuk
4. Air akan berkurangan selepas direndam, apabila semakin kurang air boleh ditambah semula sehingga penuh. Pastikan menambah air hanya 3 kali tambahan sahaja.
Air rendaman bendi yang telah siap dan dimasukkan ke dalam peti ais.
Anda tidak perlu bimbang sekiranya air rendaman tersebut menjadi lebih pekat atau likat kerana rasanya akan menjadi lebih sedap dan boleh diminum dengan segar.
Atau cara ke 2
Cara penyediaannya:
1. Kacang bendi 10 – 15 biji dibasuh dan dipotong.
2. Air masak 1 liter.
3. Masukkan bendi yang telah dipotong ke dalam air.
4. Simpan di dalam peti sejuk.
5. Minum selalu.
6. Bila air telah habis, boleh ditambah air semula hingga penuh. Air boleh ditambah sehingga 3 kali sahaja.
7. Jangan bimbang jika airnya jadi makin likat. Rasanya akan jadi makin sedap diminum segar.
Cubalah.
3. Atau boleh guna cara ke 3:
anda boleh rendam dalam air yang agak banyak supaya tidak kering ( guna bekas yg besar). Kemudian masukkan kedalam Peti ais semalaman.minum 30 minit sebelum sarapan.
Semoga bermanfaat
Khasiat Kacang Bendi
Selain dibuat sebagai sayur dalam masakan, bendi juga mempunyai banyak khasiat lain untuk kesihatan manusia.
◦ Air rendaman bendi boleh menyahkan toksik dan disamping itu juga boleh menstabilkan paras gula dan anti diabetes.
◦ Membantu mengelakkan sembelit atau mengurangkan masalah sembelit terutama di kalangan warga tua.
◦ Ia membantu pertumbuhan bakteria baik dalam saluran usus.
◦ Mencuci hati.
◦ Sejenis sayuran yang amat baik untuk mereka yang murung, keletihan dan rasa tidak selesa.
◦ Membantu merawat ulser dan mengurangkan kekejangan pada sendi.
◦ Membantu melicinkan bahagian dalam usus besar.
◦ Juga ianya dapat membantu mengurangkan radang paru-paru, sakit kerongkong serta kesakitan pada dubur.
◦ Sifat yang beralkali membantu menutralkan asid dalam badan sekaligus membantu mengurangkan masalah penghadaman.
◦ Menstabilkan kandungan gula dalam darah.
Semoga bermanfaat untuk semua. Selamat mencuba!

Bahan diperlukan:
1 cawan jus lemon- 6 biji lemon
1 cawan jus halia-500 gram halia dikisar + air
1 cawan jus bawang putih - 6 labu bawang putih
1 cawan cuka epal
2 cawan madu asli
( kisar halia dan tapis. pastu kisar pula bawang putih tapi tidak perlu ditapis . kisar secara berasingan. campur air sedikit sahaja .sekadar boleh dikisar. kesemua bhn2 diatas disatukan didalam periuk dan dimasak kecuali madu )
Cara
Campurkan semua bahan di atas dan masak dengan api yang perlahan selama 1 jam (60 minit) atau sehingga bahan campuran ini tinggal 3 cawan. Sejukkan, kemudian campurkan dengan 2 -3 cawan madu asli dan simpan dalam bekas yang bersih.
Minum campuran ubat ini satu (1) sudu makan atau satu teguk setiap hari.Amalkan sehingga 30 hari dan rasai lah perbezaannya. In sya Allah rawatan ini akan berhasil.
kalau tk buat bypass pun boleh amalkan terutama mereka yang terasa kolestrolnya banyak dan degil akibat gemuk over.
kalau untuk sekadar langkah awal supaya kolestrol tidak mengganggu jantung cukup sekadar mencampurkan ' jus epal 1 sudu teh bersama jus lemon satu sudu teh dan air 1 sudu. ATAU MINUM 1 sudu teh apple jus + air sahaja setiap kali selepas makan sesuatu yg over limit.
saya minum seteguk pagi dan seteguk malam. sebelum sarapan pagi dan sebelum masuk tidur. saya guna madu ali. memang sedap. rasanya amat menyelerakan. mcm nk mkn selalu. masam masam manis. jom cuba!
![]()
How to Make Herb-Infused Honey
PRINT RECIPE
How to Make Herb-Infused Honey
What You Need
Ingredients
Dried herbs (see Recipe Note)
Honey (see Recipe Note)
Equipment
Clean, dry jars and lids (half-pint and pint mason jars work well)
Chopstick, wooden spoon handle, or other stirrer (avoid metal, which can scratch jars)
Clean cloth for wiping jar rims
Strainer
Instructions
Prepare herbs: Herbs should be dry (see safety note, below) and may be in the form of whole sprigs or separated leaves, buds, and petals. Chopped herbs may infuse more quickly, but they may also be harder to strain out. (To dry fresh herbs, use an air or oven drying method, dehydrator, or microwave.)
Combine herbs and honey: Place herbs in the bottom of a jar and fill the jar almost to the top with honey. Using a chopstick or other implement, stir to coat the herbs with honey. Top off with more honey to fill the jar. Wipe the jar rim with a clean cloth and cover tightly.
Tip: Label the jar with the contents and date so you don't forget!
Infuse: Let the herbs infuse for at least 5 days. If the herbs float to the top, turn the jar over a few times to keep them well coated. For a more intense flavor, infuse for another week or longer.
Strain: Strain the honey into a clean jar. Depending on the volume of honey and herbs and the size of the strainer, you may need to do this in stages. (Tip: Use the leftover herbs to make a tisane.)
Store: Store the honey in a tightly covered jar in a cool, dry place. It will last indefinitely.
Recipe Notes
Basic formula: Use about 1-2 tablespoons of dried herbs per 1 cup (8 ounces) of honey.
Honey: A light, mild flavored honey generally works best. (Use the Honey Locator and support your local bees and beekeepers.)
Herbs: Use a single herb or a combination. Rosemary, sage, thyme, mint, lemon balm, lavender, chamomile, rose petals, and pine needles all make lovely infused honeys. You can also use spices like vanilla beans, cinnamon sticks, and star anise. Herbs should be dry; see instructions below.
A Note on Safety:
Although some people make infused honeys with fresh herbs, this process calls for dried herbs in order to limit water activity and the growth of Clostridium botulinum spores. For more details, see Clemson Extension's Is herb-infused honey safe to prepare at home?
TIPS Rawatan MADU KELULUT.
Selamat Mencuba!
🅾👉GASTRIK👈
Dinasihatkan agar makan 2 sudu kecil madu kelulut sebelum sarapan, 2 sudu kecil sebelum makan tengahari dan dua sudu kecil sebelum tidur malam.
🅾👉DEMAM👈
Ambil 2 sudu kecil madu kelulut dan campurkan dengan air putih diminum sebelum sarapan , sebelum makan tengahari dan sebelum tidur (3 kali sehari) .
🅾👉KANSER USUS👈
Boleh disembuhkan dengan gunakan madu kelulut yang dimakan sebanyak 3 sudu kecil dengan air putih sebelum sarapan pagi, 1 sudu kecil dengan segelas air putih sebelum makan tengahari dan 2 sudu kecil madu kelulut dengan segelas air putih sebelum tidur malam.
🅾👉CIRIT BIRIT👈
Campurkan 2 sudu madu kelulut dengan barli dan teh hijau bersama segelas air putih diminum sebelum sarapan dan sebelum tidur malam.
🅾👉ANTIBIOTIK👈
1 sudu kecil madu kelulut dicampurkan bersama ½ sudu kecil jintan hitam dan diminum 3 kali sehari
🅾👉BATUK👈
1 biji bawang putih dihaluskan + 2 sudu kecil madu kelulut. Minum sekaligus 4 kali sehari. Ulangi 3-7 hari. Atau: 1 biji limau nipis + 1 sudu kecil madu kelulut. Limau nipis diperah dalam air madu kelulut. Minum 3 kali sehari
🅾👉BIBIR PECAH👈
1 sudu kecil madu kelulutdi tempat bibir yang pecah
🅾👉KENCING MANIS👈
dinasihatkan agar makan 1 sudu kecil madu kelulutsebelum sarapan, 1 sudu kecil sebelum makan tengahari dan 1 sudu kecil sebelum tidur malam.
🅾👉BENGKAK/BENJOL👈
1 sudu besar madu kelulut + 1 biji limau nipis + 1 sudu besar kapur sireh + 1 biji kuning telur ayam kampung Campurkan sehingga sebati dan sapu pada bengkak
🅾👉CERDAS👈
2 sudu kecil madu kelulut + 1 sudu besar minyak zaitun + 3 biji kismis + 3 sudu pati kurma. Kismis dilumatkan kemudian dicampurkan dengan semua bahan yang lain, atau makannya secara berbiji. Boleh juga diminum atau ditelan sebelum sarapan dan sebelum tidur.
🅾👉CERGAS👈
Minum 1-2 sudu kecil madu kelulut 3 kali sehari. Iaitu pagi sebelum sarapan, tengah hari dan malam sebelum tidur.
🅾👉DARAH TINGGI👈
1 sudu kecil madu kelulut di minum secara terus menerus 3 kali sehari.
🅾👉DARAH KURANG (Anemia)👈
Makan 3 sudu kecil madu kelulut 3 kali sehari.
🅾👉KUDIS👈
7 biji bawang merah + 2 sudu besar madu kelulut, sebatikan dan sapukan pada tempat kudis.
🅾👉LUKA👈
Sapukan pada luka. Gunakan madu kelulut dalam kuantiti yang sesuai jika lukanya besar. Insya allah ada perubahan positif dalam masa 1-2 minggu.
🅾👉SAKIT JANTUNG👈
6 sudu kecil madu kelulut + segelas air suam. Minum 3 kali sehari. Bagi yang agak kronik, minum 1 sudu besar madu terus menerus 3 kali sehari tanpa henti selama 2 bulan, insya Allah ada perubahan yang positif.
🅾👉SAKIT PINGGANG👈
1 biji telur itik + 4 sudu kecil madu kelulut, kacau rata dan terus minum. Lakukan setiap di awal pagi (subuh).
🅾👉SAKIT PERUT👈
(memulas) Minum 1-2 sudu besar madu kelulut 3 kali sehari atau semasa sakit bersama sedikit air suam
🅾👉SESAK NAFAS👈
3 sudu kecil madu kelulut + 1 biji jus segar lobak putih, minum 2 sudu besar 3 kali sehari.
🅾👉SUSAH TIDUR👈
2 sudu kecil madu kelulut + segelas air suam. Campurkan dan minum air madu tersebut
🅾👉SEMBELIT👈
2 sudu kecil madu kelulut + segelas susu di minum setiap 4 jam.
🅾👉SUARA SERAK👈
1 inci halia (tumbuk halus) + 2 sudu kecil madu kelulut lalu ditelan. Lakukan 2 kali sehari hingga sembuh.
🅾👉SELERA MAKAN👈
Minum 1-3 sudu kecil madu kelulut 3 kali sehari
🅾👉ANAK KENCING MALAM👈
Perah sedikit lemon diatas sesudu kecil madu kelulut. Minta si kecil hirup bancuhan tersebut secara perlahan-lahan. Lakukan dua kali sehari iaitui pada pagi dan sebelum masuk tidur
🅾👉KESIHATAN ANAK👈
Madu kelulut dan ianya amat sesuai untuk makanan dan minuman anak-anak.
×gastrik..campurkan 2 sudu kecil madu dgn setegah gelas air zam2..minum 1×sehari...amal selama 2 minggu...🍯
melt & whip or cold-whip?
by Isabella | Sep 21, 2018 | Homemade skin care, Ivory Shea Butter, Unrefined Shea Butter | 1 comment

Sticking with the usual is not always a good idea
If you are like me, once you learn one way of doing something, you stick to it. Whipping shea butter is no different: I learned to first melt it all the way, then add other ingredients (carrier oils, vitamin E, essential oils), place it in the fridge to partially solidify, then whip it to perfection.
I even made my first video following this method (it’s cheesy and there’s a typo in one of the slides, sorry!), here is that video if you decide to suffer through 2:35 minutes.
The problem after a few years of doing it this way has been time and space: if you have a small batch of about 1-2 lbs of product, following this method of melting, cooling, whipping takes a couple of hours and results in a beautiful creation.
However, when you start melting 5-10 pounds of shea butter, plus other ingredients, it starts to get overwhelming: your double boiler system takes a long time to slowly melt the butter, removing it from the heat without spilling anything is nerve wracking, and finding room in your fridge is the next challenge (by the way, make sure you cover your container of melted shea when you place it in the fridge or it will pick up some of the smells from other items stored).
And that’s when I realized that, besides needing a dedicated room with a stove and fridge for my whipped skin care concoctions, I should probably consider not melting the shea butter and just whipping it like you whip – guess what? – edible butter. Or cream cheese.
How do you melt & whip shea butter correctly?
After making my debut shea video, I noticed that the method above gave it a nice airy texture at first, but after a few days the whipped shea butter would harden up as much as the regular, un-whipped shea. Fast forward to a gazillion experiments later, I have come up with the right sequence that gives a whipped butter that stays whipped.
Here is how you melt and whip shea to perfection. If you do this right, the air bubbles you introduce in the body butter while whipping will stay, resulting in a stable fluffy structure. Unless of course your body butter melts to a liquid due to hot weather, then the whipped effect will be gone – welcome to the world of truly natural skin care.
Slowly melt the shea butter in a double boiler (bain-marie in French or bagno maria in Italian) and melt it at slow heat. A burned butter is never a good idea, so slow and steady is the way to goTurn off the heat and remove the butter from the burner. At this stage you can add carrier oils and vitamin E, but it’s still too hot to add essential oilsLet it cool off to room temperature either by setting aside, or by placing your container in a bowl with ice to speed up the processStir it occasionally while you are waiting for it to cool off close to room temperature, or about 75 F (23 C)Add the essential oils if applicableWHIP IT! That’s right, you whip it while it’s still liquid. I am not sure on the science behind it, but if you skip this step, it won’t turn out as nicePut it in the fridge until it’s completely solidTake it out of the fridge and let it soften enough to be able to WHIP IT AGAINAnd you’re done!Now you can scoop the shea in your final containers, or you can pour the whipped butter in a zip lock bag, cut a corner at the end of it, then squeeze into your jars
While you get a wonderful end-product, the downside is that this process takes hours depending on the size of your batch.
How to save time: cold-whipped shea butter
I don’t want to keep a secret until the end of this article, so I will tell you that cold-whipped shea butter looks exactly the same as melt-and-whip shea. I tried it, here’s the evidence:

Go ahead and zoom in – they have the same exact texture.
Here’s how the cold-whipped shea butter above was made:
Cut the shea butter in small chunksPut the chunks of shea in a bowl or stand mixer like a KitchenAidStart whipping it on high, scrape down the butter that sticks to the sides, and keep whipping until it looks homogenousSlowly add carrier oils and essential oils as needed and keep whipping until it’s the right consistencyAnd you’re done!Now you can scoop the shea in your final containers, or you can pour the whipped butter in a zip lock bag, cut a corner at the end of it, then squeeze into your jar
This, unlike the melt-and-whip method, takes about 1 hour (depending on the size of your batch).

Whipped Shea Butter using the Cold Whip method
And below is the whipped shea made by patiently melting shea butter. Compare the two and tell me they don’t look like identical twins.

Whipped Shea Butter using the Melt & Whip method
The cold-whipping method only applies to soft butters
Cold whipping can only be done with soft butters like Shea and Mango butter. Depending on the season, these butters may vary slightly in hardness, but both shea and mango butter can be cut in pieces, put in a bowl and whipped without any melting.
However, there are some hard butters like Cocoaand Kokum, as well as waxes that when present in any amount in your skin care recipe, require the melting step.
And we’re done with today’s tutorial! I hope you learned something new, I’d love to hear from you in the comments: what’s your to-go method of making a body butter? What questions do you have? Thanks again for stopping by!
BAGI SAYA, RM 3000 ADALAH SATU UNDERSTATEMENT BAGI PENTERNAK KELULUT TEGAR (50 SARANG KE ATAS)
Primary output sarang kelulut ada 3
1. Madu
2. Propolis
3. Roti lebah
Kelulut adalah agen pendebungaan yang efektif. Penternak kelulut akan tanam pokok sumber kelulut. Buah yang terhasil dari proses pendebungaan boleh dijual dan mendatangkan pendapatan tambahan kepada penternak.
Malah ada penternak yang menanam pokok herba yang mendatangkan nilai tambah kepada kualiti madu, propolis dan roti lebah kelulut. Pendapatan dari sudut ini boleh mencecah puluhan ribu ringgit.
Selain dari itu, ada juga penternak yang menyewakan sarang kelulut kepada ladang buah-buahan. Lagi sumber pendapatan kepada penternak kelulut.
Daripada pokok sumber kelulut, boleh dihasilkan anak benih pokok yang seterusnya dijual bagi menambah pendapatan penternak kelulut.
Dan daripada primary output boleh buat produk bermacam-macam hiliran
Income dari produk hiliran boleh cecah RM 10k sebulan dan tak bermusim
Selain dari itu ada expertise boleh buat kursus. Yuran kursus sahaja eg. RM 150 satu peserta dengan 30 peserta satu sessi dapat RM 4500
Jualan bahan mentah tambahan produk hiliran, dan produk hiliran itu sendiri, setiap sessi kursus boleh mencecah RM 1500 jika setiap peserta hanya berbelanja RM 50
Tahukah Anda?
Madu kelulut sememangnya mempunyai banyak khasiat...,
Disebabkan lebah kelulut lebih kecil berbanding lebah biasa, ia mampu menghisap madu daripada bunga sehingga ruang paling dalam. Hasilnya, madu yang dihisap mengandungi banyak vitamin dan mineral.
Antara bahan penting yang dihasilkan kelulut ialah propolis. Propolis dihasilkan oleh lebah melalui campuran air liurnya dengan bahan makanannya seperti debunga, kulit kayu, pucuk-pucuk pokok dan bunga...,
Anak-anak lebah kelulut dan kokun sangat sensitif kepada serangan virus, kulat dan serangga perosak. Untuk memastikan sarang sentiasa bersih, steril dan kondisi terkawal, lebah kelulut menghasilkan propolis yang berfungsi sebagai antikulat, antivirus dan antibakteria...,
Khasiat propolis ialah mengandungi kesemua 16 jenis asid amino, glukosa, vitamin A,B,C,D dan E, bioflavanoid dan pelbagai mineral. Bioflavanid sangat baik untuk kelancaran dan baik pulih sistem tubuh manusia dan ternakan.
“Apabila kita menyebarkan kebaikkan walaupun satu ayat, kelak kebaikkan juga yang akan datang kepada kita. Apabila anda kongsikan artikel ini, ia juga adalah satu usaha untuk menyebarkan kebaikkan. Insyallah lebih ramai yang akan mendapat manfaat.”
#RMC
#RaWnRaRe
Bila cerita hal kanser. Ya. Kita semua takut . Dan pengalaman kami sendiri bila arwah nenek kami Mok disahkan kena kanser stage 2 dan dalam masa takberapa lama terus kena stage 4.
Payudara sebelah dipotong untuk mengelakkan merebak. Tetapi ketika itu usianya sudah lanjut, doktor yang mengubati beliau beritahu ada kaedah lain untuk berubat selain kaedah hospital. Usahalah, katanya. Please janganlah viralkan post ini. Tidak mahu ia jadi isu perbalahan.
Allah tunjukkan kuasa penyembuhannya bila saja dia mahu. Arwah mok bebas sel kanser dalam masa 10 minggu. Kami guna kaedah terapi ais, air terjun yang bertindak sebagai sumber ion negatif, ubat-ubatan daripada pusat perubatan RAOHA dan habbatusauda dan minyak zaitun .
Kami seluruh keluarga usahakan bawa mok ke air terjun di Selayang seminggu 3 kali. Urutan ais 3 kali sehari. Dan alhamdulillah Allah beri bakat dan minat berubat itu kepada adik saya yang ke-2. Allah sahaja yang tahu, gembiranya kami. Tetapi Mok pulang ke rahmatullah 3 -4 tahun selepas itu, kerana kulit kakinya tercabut akibat kena air panas, panjang ceritanya. Ajalnya begitu. Kami redha.
Dan kali ini, sahabat baik mama saya yang sudah seperti ahli keluarga, kena kanser payudara dan merebak ke kanser paru-paru , stage 4. Dan doktor sudah suruh bawa balik. Dan hanya diberikan morfin untuk menahan. Tapi Allahuakbar, kuat perjuangannya dalam menahan sakit sehingga tidak dapat tidur.
Allah itu maha penyayang. Kami cuba bantu kaedah merawat mok, kepada Aunty aya. Nampak banyak perubahan, sudah sedikit-sedikit berpisah dengan morfin. Sudah boleh bercakap dan makan sedikit-sedikit. Tetapi bukan sedikit cabarannya.
Kami menanti keajaiban Allah moga Aunty aya dapat sembuh seperti Mok sembuh dulu.
Sahabat, minta doakan Aunty Aya...
Jus yang betul2 menjadi untuk gout suami saya yang lama juga menderita sakit ni sb kaki seafood.
Hari ni nak share lagi bagi sapa2 yang ada sakit gout. Jus ni betul2 serasi dengan suami dan ada byk feedback org yang da cuba katanya ok.
Tiga bahan ni kalu konsisten minum inshaAllah akan sembuh.
Suami saya xpenah tinggal minum jus ni. Alhamdulillah allopurinol dgn goutnor dah xambil. Dua jenis ubat ni wajib ada dalam tangan org gout kan??.
Saya share resepi ni untuk semua dan doakan saya sekeluarga sihat walafiat ya.
Gambar kat bawah Ni sukatan saya buat banyak2 sebab mudah utk dia minum seminggu terus.
Ni bahan2 utk 2x minum ya
Timun 1biji
Celery 2batang
Lemon satu potong atau 5sudu air dia
Saya guna slowjuice maker sb dia perah 100% jus jd lebih berkesan untuk suami.
Kalu nak blender pakai satu cawan air blend dan tapis.
Minum 2x sehari
Waktu pagi lepas bangun tido @ sebelum sarapan
Waktu malam masa nak tido.
Amalkan inshaAllah akan sembuh.
Tanda awal2
-buku lali akan bengkak sikit sb tindak balas jus ni.
Kemudian lama2 bengkak buku lali surut sebab kristal urid asid yg buat kaki bengkak tu mula pecah dan lembut.
Skrg kaki suami xbengkak dh .
Berat badan dia pun maintain n nampak kurus.
Dah amal dekat setahun.
Seafood tetap makan.cuma dia skrg xmakan daging lembu. Yang lain tarammm xcukup tanah kata org 🤣🤣🤣.
Selamat mencuba ya.
cdt: cik mil haneena
Cara Betul Minum Madu Sampai Jadi Ubat Untuk Sembuhkan Penyakit
1. Pilih Madu Yang Asli, Caranya..
Hati-hati ketika membeli madu. Ini kerana, 60 peratus madu yang ada di pasaran banyak yang tiruan. Banyak petua dikongsikan untuk mengesan madu asli. Misalnya, tengok yang paling likat, tak dihurung semut dan sebagainya. Tapi dengan kepandaian sekarang semua itu boleh direka.
Cuma satu cara ini, manusia tak boleh tiru. Caranya : Ambil piring, tuangkan madu satu sudu kecil di atasnya. Kemudian, siramkan air suam. Goncang. Jika madu asli, anda akan nampak ia membentuk corak sarang lebah atau heksogan.
2. Minum Madu Untuk Rawat Sakit Di Bahagian Kepala
Penyakit yang dialami di bahagian kepala seperti migrain, madu hendaklah diminum terus. Jangan dicampur air. Oleh sebab penciptan bumi dan manusia yang daripada tanah ini tidak terpisah, ada gelombang yang berputar 24 jam maka jadual makan madu perlu tepat. Untuk rawatan di bahagian kepada, ambillah selepas waktu subuh tapi sebelum habis waktu dhuha.
3. Untuk Rawatan Bahagian Badan
Masalah berkaitan perut, usus untuk capai nikmat kesembuhan maksima minumlah madu dengan air suam. Madu walaupun sejenis cairan ia mengandungi atom yang kuat. Sebab itu, dia kena dicairkan dengan air.
Cara minum : Ambil satu sudu teh saja pada waktu selepas dhuha ke zohor. Biar sedikit asalkan istiqomah.
Kacau madu ikut arah lawan jam. Ini kerana semua benda yang lawan jam akan menghasilkan tenaga. Manakala yang ikut jam akan menguraikan energi dan tak jadi ubat. Contoh paling mudah, ketika orang bertawaf dan pokok yang menjalar.
4. Ambil Madu Untuk Rawat Bahagian Pinggang Ke Bawah
Cara minum : Masa yang perlu diambil ketika ambil madu antara waktu zohor ke asar.
5. Rawatan Bahagian Bawah
Waktu minum madu adalah antara asar ke maghrib. Sebab gelombang pada waktu ini menurunkan sistem imun badan kita.
Tip Ini Penting!
√ Penyakit ini datang sebab adanya suhu panas dan sejuk. Bila kita sakit, majoriti suhu badan akan meningkat. Ketahanan badan pula menurun.
√ Macam mana nak tahu sama ada badan kita sedang panas atau sejuk. Check cuping telinga. Kalau cuping telinga sejuk bermakna badan kita tengah panas dan kalau cuping telinga panas, bermakna badan anda sejuk.
√ Sebab itu, campuran air dan madu pun kena betul. Untuk dapatkan madu yang panas, kena tuang air dulu dalam gelas baru letak madu. Manakala untuk dapatkan madu sejuk, letak madu dulu dalam gelas barulah tuang air.
Jika Badan Panas
Cara minum madu -> madu dulu dalam gelas baru campur air = madu sejuk
Dan bila diminum dengan cara ini ia akan sejukkan badan.
Jika Badan Sejuk
Ini cara minum madu. tuang air dulu dalam gelas baru campur madu = madu panas
√ Selepas minum madu, jangan makan campuran ikan dengan susu. Elakkan makan ikan dengan daging. Ini yang dikatakan laut jangan bertemu darat. Tak bagus untuk perut.
√ 1 sudu kecil madu kelulut bersamaan dengan 10 sudu kecil madu biasa. Ini kerana lebah kelulut itu kecil, ia boleh masuk sampai ke rongga bunga. Tapi hati-hati ketika membeli madu kelulut. Jangan cari yang berwarna susu kerana dibimbangi ada campuran buah laici yang masam.
√ Madu mentah ini boleh ‘boost’ energi seseorang. Jika mahu memandu jarak jauh katakan pukul 4 petang nak bergerak, jam 8 pagi dah kena minum.
√ Jangan letak madu di tempat yang akan mengubah molekul madu. Dalam peti ais misalnya.
√ Madu juga boleh jadi ubat mata yang mujarab. Campurkan dengan air hujan dan titiskan di mata. Nanti akan ada rasa pedih. Titikkan antara waktu selepas subuh dan sebelum dhuha. Kenapa ikut prinsip minum madu yang dinyatakan di atas untuk rawatan di bahagian kepala.
Kalau tidak ikut waktu yang tepat, ia menghilangkan rasa sakit tapi tidak menghilangkan penyakit.
7 REMEDI MADU YG MUDAH DAN EFEKTIF UTK HILANGKAN JERAWAT DAN KESAN PARUT ANDA PATUT CUBA DI RUMAH.
Siapa yang taknak kulit muka licin dan bersih kan? Tiada masalah jerawat, jeragat. Nak jumpa kawan2 pun rasa konfiden.
Tapi rasa sangat malu, tak konfiden, bila kulit muka dah mcm permukaan bulan. Bintik2 hitam, parut dan mcam2 lagi lah.
Nak jumpa family sendiri pun rasa malu, apatah lagi nk jumpa kawan2.
Jadi, dalam post ni, saya akan kongsikan bagaimana anda boleh hilangkan jerwat dan kesan parut dengan petua turun temurun yg tak berkesan dan 100% tak merbahya hanya menggunkan madu.
Faedah dan kelebihan madu :
✔ Merupakan antiseptik semulajadi
✔Mengelakkan pembiakan kuman
✔ Membasmi kuman di muka
✔Ada ciri2 anti-inflammatory
✔ Mengurangkan kemerahan
✔Mengurangkan kesan bengkak
✔Mengekalkan kelembapan kulit
✔Mengelak dari mengelupas
✔Mengelak kekeringan kulit
Berikut adalah 7 remedi madu yg terbukti berkesan utk mengatasi jerawat dan kesan parut :-
[1] mask madu
- Cuci muka anda dgn air suam, utk membuka pori-pori.
- Sebelum muka kering, sapukan madu keliling muka
- Biar selama 30 min
- Bilas dgn air
[2] madu + kayu manis
- Campurkan 1 sudu serbuk kayu manis + 2 sudu madu
- Gaul sehingga dapat satu capuran yg likat.
-Boleh letak dkt kawasan jerawat dan parut shj atau satu muka.
- Biarkan selama 15 minit dan bilas dgn air
(+) Kenapa berkesan?
Kayu manis ada ciri2 anti-inflammatory dan anti-microbial yg boleh mengurangkan jerawat dan memudarkan parut.
[3] Madu + gula pasir
- Campurkan 1 sudu gula pasir + 1 sudu madu
- Gaulkan dgn lembut
- Sapu di muka sebelum gula tu cair
- Biarkan selama 15 min dan bilas dgn air suam
(+) Kenapa berkesan?
- Gula dapat membuang sel kulit yg mati , men hurling man minyak , dan mengosongkan pori-pori yg tersumbat di muka.
[4] Madu + tea tree oil
- Capurkan 1 sudu madu + 2,3 titis tea tree oil
- Sapukan di muka
- Biarkan selama 10 min dan bilas.
(+) Kenapa berkesan?
Tea tree oil mampu membasmi bacteria yg menyebabkan jerawat. Cara ini juga berkesan utk mempercepatkan proses pemulihan kulit akibat jerawat.
[5] Madu + teh hijau
- Letakkan beg teh dlm air panas dan biarkan beberapa minit.
- Keluarkan beg teh, tunggu sejuk sikit, dan buka beg utk keluarkan daun teh hijau.
- Campurkan daun teh hijau + madu
- Gaulkan sehingga sebati
- Sapukan di muka
-Biar 10-15 min dan bilas.
(+) Kenapa berkesan?
Teh hijau ada byk faedah, antaranya adalah sifat anti-oxidant dapat menyegarkan kulit muka, mengurangkan minyak, dan mengelakkan parut jerawat
[6] Madu dan limau
- Campurkan 1 sudu jus limau 2 sudu madu
- Gaul dan sapu ke muka
- Biarkan 20 min dan bilas dgn air suam. Dan bilas dgn air sejuk.
(+) Kenapa berkesan?
Citric acid dlm limau dapat membuang sel kulit mati dan mengosongkan pori yg tersumbat.
Limau juga ada vitamin c yg membantu proses pemulihan semula jadi dlm kulit.
[7] Madu + tomato
- Campurkan 1 sudu puree tomato + 2 sudu madu.
- Sapukan campuran di muka dan biarkan selama 10min.
- Bilas dgn air
(+) Kenapa berkesan?
Asid organic dlm tomato mempunya sifat antibacterial.
Tomato juga mempunyai lycopene sebagai antioxidant dan melindungi kulit muka drpd kerosakan.
Sedikit TIPS Rawatan MADU KELULUT yg boleh digunakan.
Selamat Mencuba! :
GASTRIK
Dinasihatkan agar makan 2 sudu kecil madu kelulut sebelum sarapan, 2 sudu kecil sebelum makan tengahari dan dua sudu kecil sebelum tidur malam.
DEMAM
Ambil 2 sudu kecil madu kelulut dan campurkan dengan air putih diminum sebelum sarapan , sebelum makan tengahari dan sebelum tidur (3 kali sehari) .
KANSER USUS
Boleh disembuhkan dengan gunakan madu kelulut yang dimakan sebanyak 3 sudu kecil dengan air putih sebelum sarapan pagi, 1 sudu kecil dengan segelas air putih sebelum makan tengahari dan 2 sudu kecil madu kelulut dengan segelas air putih sebelum tidur malam.
CIRIT BIRIT
Campurkan 2 sudu madu kelulut dengan barli dan teh hijau bersama segelas air putih diminum sebelum sarapan dan sebelum tidur malam.
ANTIBIOTIK
1 sudu kecil madu kelulut dicampurkan bersama ½ sudu kecil jintan hitam dan diminum 3 kali sehari
BATUK
1 biji bawang putih dihaluskan + 2 sudu kecil madu kelulut. Minum sekaligus 4 kali sehari. Ulangi 3-7 hari. Atau: 1 biji limau nipis + 1 sudu kecil madu kelulut. Limau nipis diperah dalam air madu kelulut. Minum 3 kali sehari
BIBIR PECAH
1 sudu kecil madu kelulutdi tempat bibir yang pecah
KENCING MANIS
dinasihatkan agar makan 1 sudu kecil madu kelulut sebelum sarapan, 1 sudu kecil sebelum makan tengahari dan 1 sudu kecil sebelum tidur malam.
BENGKAK/BENJOL
1 sudu besar madu kelulut + 1 biji limau nipis + 1 sudu besar kapur sireh + 1 biji kuning telur ayam kampung Campurkan sehingga sebati dan sapu pada bengkak
CERDAS
2 sudu kecil madu kelulut + 1 sudu besar minyak zaitun + 3 biji kismis + 3 sudu pati kurma. Kismis dilumatkan kemudian dicampurkan dengan semua bahan yang lain, atau makannya secara berbiji. Boleh juga diminum atau ditelan sebelum sarapan dan sebelum tidur.
CERGAS
Minum 1-2 sudu kecil madu kelulut 3 kali sehari. Iaitu pagi sebelum sarapan, tengah hari dan malam sebelum tidur.
DARAH TINGGI
1 sudu kecil madu kelulut di minum secara terus menerus 3 kali sehari.
DARAH KURANG (Anemia)
Makan 3 sudu kecil madu kelulut 3 kali sehari.
KUDIS
7 biji bawang merah + 2 sudu besar madu kelulut, sebatikan dan sapukan pada tempat kudis.
LUKA
Sapukan pada luka. Gunakan madu kelulut dalam kuantiti yang sesuai jika lukanya besar. Insya allah ada perubahan positif dalam masa 1-2 minggu.
SAKIT JANTUNG
6 sudu kecil madu kelulut + segelas air suam. Minum 3 kali sehari. Bagi yang agak kronik, minum 1 sudu besar madu terus menerus 3 kali sehari tanpa henti selama 2 bulan, insya Allah ada perubahan yang positif.
SAKIT PINGGANG
1 biji telur itik + 4 sudu kecil madu kelulut, kacau rata dan terus minum. Lakukan setiap di awal pagi (subuh).
SAKIT PERUT
(memulas) Minum 1-2 sudu besar madu kelulut 3 kali sehari atau semasa sakit bersama sedikit air suam
SESAK NAFAS
3 sudu kecil madu kelulut + 1 biji jus segar lobak putih, minum 2 sudu besar 3 kali sehari.
SUSAH TIDUR
2 sudu kecil madu kelulut + segelas air suam. Campurkan dan minum air madu tersebut
SEMBELIT (susah buang air besar)
2 sudu kecil madu kelulut + segelas susu di minum setiap 4 jam.
SERAK (Hilang Suara)
1 inci halia (tumbuk halus) + 2 sudu kecil madu kelulut lalu ditelan. Lakukan 2 kali sehari hingga sembuh.
SELERA MAKAN
Minum 1-3 sudu kecil madu kelulut 3 kali sehari
ANAK KENCING MALAM
Perah sedikit lemon diatas sesudu kecil madu kelulut. Minta si kecil hirup bancuhan tersebut secara perlahan-lahan.Lakukan dua kali sehari iaitui pada pagi dan sebelum masuk tidur
KESIHATAN ANAK
Madu kelulut mengandungi pelengkap gizi dan vitamin dan ianya amat sesuai untuk makanan tambahan dan minuman anak-anak.
KHUSUS LELAKI
Lemah Syahwat
3 sudu kecil madu kelulut + 3 biji lada putih atau lada hitam + 1 inci halia + 1 biji limau nipis + 1 sudu besar kopi + 1 sudu besar kicap manis + 1 biji kuning telur ayam. Caranya, lada dan halia ditumbuk halus lalu digaul dengan semua bahan di atas. Minum 2-3 jam sebelum tidur.
Menambah Eraksi (ketegangan )
11 biji lada putih atau lada hitam + 3 biji bawang putih ditumbuk sampai halus + 1 biji kuning telur ayam + 2 sudu besar madu kelulut. Minum selama seminggu.
Mani Cair
5 biji kemiri/buah keras ditumbuk halus + 1 biji kuning telur ayam + 1 sudu besar madu kelulut. Minum selama seminggu.
Menguatkan dan Mengeraskan alat kelamin (Minum) 20 biji bawang merah + 20 biji bawang putih diperah dan diambil airnya, campurkan madu kelulut sebanyak air perahan bawang tadi, lalu dimasak sampai air bawangnya hilang, minum 3 sudu kecil selama 7 hari.
KHUSUS WANITA
Air Muka:
Untuk mengindah wajah air muka yang kering tidak berseri. Bahan: Madu kelulut, Minyak Zaitun, air sejuk dan air suam. Caranya, basuh muka dengan air sejuk dan biarkan 3 minit kemudian lumurkan muka dengan madu kelulut selama 15minit. Kemudian bilas muka dengan air suam dan biarkan kering. Kemudian lumuri muka dengan minyak Zaitun. Insya allah ada perubahan yang positif setelah diamalkan selama 1 minggu.
Meremajakan Kulit Muka
½ cawan tepung gandum + 2 sudu besar madu kelulut + putih telur secukupnya hingga terbentuk pasta untuk masker. Sapukan ke wajah hingga rata, biarkan selama 1 jam. Setelah itu bersihkan dengan air suam dan air sejuk secara bergantian. Gunakan air sejuk pada bilasan terakhir. Lakukan dengan kerap hingga anda memiliki wajah yang bersih, halus, licin dan bercahaya sehingga kelihatan lebih muda.
Menghilangkan kedut Wajah
1 biji telur ayam + 1 sudu besar madu kelulut dikacau rata dan biarkan selama 30 minit. Kemudian bersihkan dengan air suam dan air sejuk secara berselang seli diakhiri dengan air sejuk. Cara ini juga digunakan untuk melicinkan serta menghaluskan kulit tubuh yang lain.
Menghaluskan Kulit Tangan
2 sudu besar madu kelulut + 1 biji perahan limau nipis dikacau rata lalu disapukan keseluruh kulit tangan hingga rata sambil diurut dan dipicit dan biarkan selama 30 minit. Kemudian cuci dengan air suam dan diakhiri air sejuk. Apabila sering dilakukan maka kulit tangan anda akan menjadi sangat halus dan lembut.
Jerawat dan Bintik Hitam
di Wajah 1 gelas air suam + 2 sudu besar madu kelulut dan dikacau rata lalu disapukan ke wajah hingga rata dan dibiarkan selama 20 minit.Kemudian cuci dengan air suam dan yang terakhir air sejuk. Amalkan minum 2 sudu kecil madu 3 kali sehari sebelum makan.
Ibu mengandung
Amalkan 1 sudu kecil madu pagi sebelum sarapan serta malam sebelum tidur,inshaallah mudah melahirkan anak, anak bebas penyakit kuning
Honey and Beeswax Soap Recipe
Ingredients
• 358 grams olive oil (44.8 percent)
• 225 grams coconut oil at 76 degrees (28.1 percent)
• 177 grams palm oil (22.2 percent)
• 32 grams castor oil (4 percent)
• 7.2 grams beeswax (0.9 percent)
• 9 ounces distilled water, divided
• 111 grams lye (NaOH—sodium hydroxide)
• 1 tablespoon honey
• 2 tablespoons fragrance (if desired)
Other Materials
• Disposable paper bowl
• Container for lye
• Large plastic spoon or high heat spatula
• Stainless-steel pot or microwave-safe container for oils
• Stainless-steel whisk or immersion blender
• Digital scale
• Mold (silicone bread loaf pan preferred, but any mold will do)
• Freezer paper to line mold
Instructions
1. Gather all the ingredients together and arrange them on the table in the order in which they appear in the recipe.
2. Always make the lye solution first, as it requires cooling time. Measure the lye into a disposable paper bowl and set aside.
-Advertisement-
3. Measure out 5 ounces distilled water and pour into the lye-safe container. Place the container on heat resistant surface and add the dry lye crystals to the water (never the other way around). Stir until all the lye is completely dissolved. Set the lye mixture aside to cool.
4. In a microwave-safe container, add the honey to the remaining 4 ounces water and stir to incorporate. Microwave for a couple of seconds at a time until the honey is completely dissolved. Set aside.
5. Prepare the mold, lining with freezer paper with the shiny side face up.
6. Heat all of the solid oils and beeswax in a stainless steel pot on the stove top or in a microwave-safe container in the microwave. Once melted, pour the melted solid oils into the mixing container and add the liquid oils, stirring well to ensure it is all mixed.
-Advertisement-
7. Check the temperature of both the lye and the oils. To keep the beeswax from hardening, the ideal temperature of the oils will need to be around 120 degrees. The goal is to have the lye right around that temperature as well.
8. Add the reserved honey water to the lye water. It will probably turn colors; mine usually turns some sort of pinkish hue. That’s normal.
9. Pour the lye water into the oils and mix with the immersion blender. Once it is emulsified, but not yet at trace, add the fragrance if desired. Keep mixing until it gets to “trace.’’ For this soap, I recommend mixing until it is a light to medium trace. Once trace is achieved, work quickly to get the soap into the mold, as it may solidify quickly.
10. Pour the soap batter into the prepared mold, taking care to scrape all of the soap residue out of the pot. Tap the soap mold on the counter a couple of times to remove any air pockets. Smooth out the top and cover the mold with a piece of cardboard to hold in some of the heat.
Note: When using honey, beeswax, or any kind of milk, these ingredients can cause the soap to get hotter than normal and it may not be necessary to cover the mold.
11. After about twenty-four hours, the soap should be cool, relatively hard, and ready to unmold and slice. If it still seems a bit soft, leave it in the mold and check it again after another day or so. Once the soap seems hard enough, cut it into individual bars. Place the cut bars on freezer paper with space between them and set aside for about a month to dry and cure, rotating them occasionally so that all sides dry evenly.
12. I like to store my soaps in a cool dry place until needed. As they age, they will continue to lose water, making them longer lasting in the shower and more mild, so older soaps are a good thing to have around. If they are to be given as gifts, a paper cigar band, paper box, or muslin bag are best for packaging, since they allow the soap to breathe. Makes about eight 4-ounce bars.
Find more recipes and information in The Ancient History of Beeswax.
Beeswax and honey make a sweet smelling soap
Honey soap smells of caramelized honey and will usually turn a golden brown color. By adding a little beeswax into the mix you’re making a truly bee-autiful soap that is also hard and smooth. Be careful with how much beeswax you use in soap though, using more than 2% of your recipe can stop it from lathering up.
Honey, Oats and Beeswax Soap
700g batch – makes approx. 6-7 bars
5% superfat
98g (3.5oz) Sodium Hydroxide
200g (7oz) Water
210g (7.4oz) Refined Coconut oil
301g (10.6oz) Olive oil
105g (3.7oz) Castor oil
70g (2.5oz) Sustainable Palm oil
14g (0.5oz) Beeswax
1 tsp Honey
1 tsp Rolled Oats
9 drops of Grapefruit Seed Extract

1. Make sure there are no kids running around and that all pets are locked out of your work area. Lye can be very dangerous if it’s spilled on the skin, splashed into the eyes or is accidentally ingested. Put on your safety goggles, apron and plastic gloves to continue.
2. Measure all your oils into a pan and your water into a heat resistant, tall container.
3. Begin heating up the oils on the hob until just melted. Put the hob on the lowest heat — the oils will take less time to melt than you think.
4. While the oils are heating up, measure the lye into the water in a well ventilated area, stir well and try not to breathe the fumes. The mixture will get very hot and may even begin boiling so keep your face well away and if you can. Add the honey if you want your soap to be a darker brown colour.
You can then place the container of lye in a tub of water to help it cool down a bit but keep an eye on its temperature to make sure it doesn’t get too cold. Cold lye water can cause your beeswax to harden on contact creating a false trace and ruining your soap.

5. When both the oil and lye water are around 120°F (and within 10 degrees of each other) you can mix them together.
Start by pouring in about two tablespoons of lye-water into the oil and stir well before pouring in the rest.

